Azure PowerShell automation tasks are one of the fastest ways for administrators to improve efficiency in cloud management. As environments grow, repeating the same manual steps across dozens or hundreds of resources becomes unsustainable. That’s where automation shines.
For Azure administrators, PowerShell is one of the most powerful tools for streamlining operations. It reduces human error, saves time, and enforces consistency across hybrid environments. In this article, I’ll cover the five most important Azure admin tasks you should automate with PowerShell — along with free resources to help you get started.
Table of Contents
1. User Account Provisioning and Deprovisioning

Onboarding and offboarding users is one of the most repetitive tasks for any admin.
Here’s a minimal script to get you started:
Modules:
Microsoft.Graph.Users,Microsoft.Graph.Groups
First time only:Install-Module Microsoft.Graph -Scope CurrentUser
powershell

# Connect (interactive)
Connect-MgGraph -Scopes "User.ReadWrite.All","Group.ReadWrite.All","Directory.ReadWrite.All"

# --- Provision (create user, assign license placeholder, add to groups) ---
$upn        = "jane.doe@contoso.com"
$display    = "Jane Doe"
$password   = "TempP@ssw0rd123!"

# Create user
$newUser = New-MgUser -AccountEnabled:$true `
  -DisplayName $display `
  -PasswordProfile @{ forceChangePasswordNextSignIn = $true; password = $password } `
  -MailNickname "jane.doe" -UserPrincipalName $upn

# Add to groups (replace with your Group Ids)
$groupIds = @(
  "00000000-0000-0000-0000-000000000001", # Finance
  "00000000-0000-0000-0000-000000000002"  # PowerBI-Users
)
$groupIds | ForEach-Object {
  New-MgGroupMemberByRef -GroupId $_ -BodyParameter @{ "@odata.id" = "https://graph.microsoft.com/v1.0/directoryObjects/$($newUser.Id)" }
}

# --- Deprovision (disable + remove group memberships) ---
$user = Get-MgUser -UserId $upn
Update-MgUser -UserId $user.Id -AccountEnabled:$false

# Remove from all groups
(Get-MgUserMemberOf -UserId $user.Id).Id | ForEach-Object {
  Remove-MgGroupMemberByRef -GroupId $_ -DirectoryObjectId $user.Id -ErrorAction SilentlyContinue
}
What it does
- Connect-MgGraph with directory-write scopes so the session can create users and manage group membership.
- New-MgUser creates a new Entra ID (Azure AD) user with:
AccountEnabled = $true- Temporary password that must be changed at first sign-in
- UPN/MailNickname/DisplayName
- Group assignment: iterates a list of Group IDs and uses New-MgGroupMemberByRef to add the new user to each group.
- Deprovisioning flow: looks up the user (
Get-MgUser), disables the account (Update-MgUser -AccountEnabled:$false), and removes the user from all groups by enumerating Get-MgUserMemberOf and calling Remove-MgGroupMemberByRef.
Why it’s structured this way
- Uses Graph (not legacy AzureAD) to align with Microsoft’s current API direction.
- Separates provision and deprovision steps to make each action obvious and auditable.
What to customize
- Replace
$upn,$display,$passwordwith your org’s onboarding defaults. - Replace
$groupIdswith real group GUIDs. - Optionally add license assignment via Graph (e.g.,
AssignLicense) if you want full lifecycle in one runbook.
Permissions to note
- The Graph scopes (or app permissions) must include User.ReadWrite.All and Group.ReadWrite.All; Directory.ReadWrite.All is used for breadth of write operations.
With PowerShell and the AzureAD or Microsoft Graph modules, you can:
- Automatically create user accounts with the correct licenses.
- Assign users to groups and apply RBAC roles.
- Deactivate or remove accounts during offboarding.
This not only saves time but also supports compliance frameworks like SOC 2 and HIPAA by enforcing consistent policies. For example, automating account removal ensures that ex-employees no longer have lingering access — a common security risk.
Free Resource: Manage users with PowerShell in Microsoft Entra ID
2. Azure VM Management
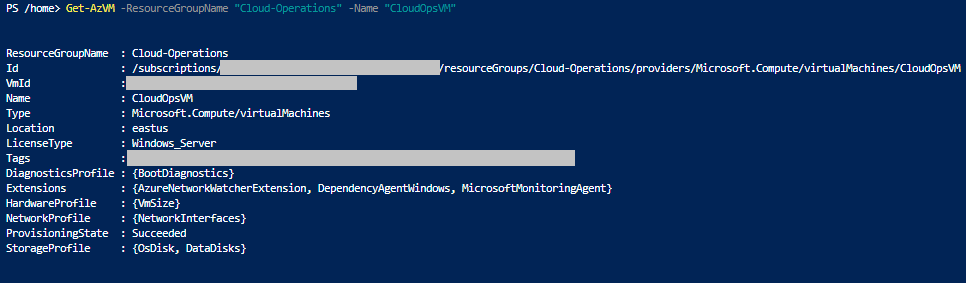
Manually starting, stopping, or resizing VMs is tedious and prone to oversight.
Here’s a minimal script to get you started:
Modules:
Az.Accounts,Az.Compute,Az.Resources
First time only:Install-Module Az -Scope CurrentUser
powershell

Connect-AzAccount

# Stop all Dev VMs after hours (tag-driven)
$subs = Get-AzSubscription
$targetTagKey = "Environment"
$targetTagVal = "Dev"

foreach ($sub in $subs) {
  Set-AzContext -SubscriptionId $sub.Id
  $vms = Get-AzVM -Status | Where-Object {
    $_.Tags[$targetTagKey] -eq $targetTagVal -and $_.PowerState -eq "VM running"
  }
  foreach ($vm in $vms) {
    Write-Host "Stopping $($vm.Name) in $($sub.Name)"
    Stop-AzVM -Name $vm.Name -ResourceGroupName $vm.ResourceGroupName -NoWait -Force
  }
}

# Example: bulk downsize Dev VMs during cost-savings window (preview safely)
$preview = $true
$targetSize = "Standard_D2s_v5"

$devVMs = Get-AzVM | Where-Object { $_.Tags[$targetTagKey] -eq $targetTagVal }
foreach ($vm in $devVMs) {
  if ($preview) {
    Write-Host "[PREVIEW] Would resize $($vm.Name) to $targetSize"
  } else {
    Stop-AzVM -Name $vm.Name -ResourceGroupName $vm.ResourceGroupName -Force
    Update-AzVM -VM (Set-AzVMSize -VM $vm -Size $targetSize) -ResourceGroupName $vm.ResourceGroupName
    Start-AzVM -Name $vm.Name -ResourceGroupName $vm.ResourceGroupName
  }
}
Tip: Convert the stop block into an Azure Automation Runbook and add a schedule (e.g., 7pm weekdays).
What it does
- Connect-AzAccount and iterate all subscriptions (
Get-AzSubscription). - Find running VMs with a tag filter (
Environment=Dev), then Stop-AzVM in non-blocking mode to cut cost after hours. - Includes a bulk resize block:
- A
$previewswitch prints what would happen (safe dry run). - If not previewing, it stops the VM, updates the size (
Set-AzVMSize+Update-AzVM), and restarts it.
- A
Why it’s structured this way
- Tag-driven selection keeps it idempotent and safe so you only touch the intended fleet.
- Preview mode prevents accidents during first runs or when testing new target sizes.
What to customize
$targetTagKey/$targetTagValto match your governance tags.$targetSizeto a SKU available in each region/cluster.- If you don’t need cross-subscription, remove the outer subscription loop for speed.
Gotchas
- Some VM sizes aren’t available in all regions or for certain hardware clusters handle exceptions or pre-validate with
Get-AzComputeResourceSku. - Stopping/starting large fleets can create quota or boot-time spikes—consider staggering.
With PowerShell, you can:
- Automate start/stop schedules for dev/test environments to reduce costs.
- Bulk resize VMs when workloads change (for instance, scaling down after peak business hours).
- Query VM status across subscriptions with a single script.
VM management is where admins often first see automation’s impact , one script can save hundreds of dollars in monthly costs by ensuring resources don’t run unnecessarily.
Free Resource: Automate VM management with Az PowerShell
3. Azure Resource Tagging & Policy Enforcement

Tagging resources is critical for cost tracking, governance, and environment management.
Here’s a minimal script to get you started:
Modules:
Az.Resources
Pattern: apply a baseline tag set only when missing; never clobber existing values.
powershell

Connect-AzAccount
Set-AzContext -Subscription "YOUR-SUB-NAME-OR-ID"

$baseline = @{
  "Owner"       = "PlatformTeam"
  "CostCenter"  = "FIN-1001"
  "Environment" = "Dev"         # override per scope if needed
}

# Tag all untagged or partially tagged resources in a resource group
$rg = "rg-app-dev-eastus"
$resources = Get-AzResource -ResourceGroupName $rg

foreach ($res in $resources) {
  $tags = @{}
  if ($res.Tags) { $tags = @{} + $res.Tags }   # copy existing
  $baseline.GetEnumerator() | ForEach-Object {
    if (-not $tags.ContainsKey($_.Key) -or [string]::IsNullOrWhiteSpace($tags[$_.Key])) {
      $tags[$_.Key] = $_.Value
    }
  }
  Set-AzResource -ResourceId $res.ResourceId -Tag $tags -Force | Out-Null
  Write-Host "Tagged $($res.Name)"
}
Bonus: pair this with an Azure Policy that denies creation of resources without required tags, and let this script remediate historical drift.
What it does
- Builds a
$baselinehashtable of required tags (Owner, CostCenter, Environment).- Reads current resource tags in a RG, merges in only missing or empty tags, then Set-AzResource -Tag to apply.
- Outputs which resources were tagged.
Why it’s structured this way
- Idempotent merge: it won’t overwrite existing values—safer for shared environments.
- Scopes to a resource group to keep the blast radius small.
What to customize
$baselinewith your org’s required tags.$rgto your target resource group.- Extend to subscription-wide by enumerating RGs (
Get-AzResourceGroup).Governance pairing
- Combine with an Azure Policy that denies creation of untagged resources so this script remediates drift while policy prevents new drift.
Instead of tagging resources one by one, PowerShell scripts can:
- Automatically apply tags (e.g., Environment: Dev, Cost Center: Finance).
- Validate existing tags against governance policies.
- Generate reports on untagged resources.
Consider a scenario where a finance department wants to understand exactly how much each business unit spends in Azure. Without proper tagging, cost analysis is nearly impossible. Automating this task not only saves time but also provides leadership with accurate data.
Free Resource: Azure Resource Tagging Best Practices
4. Monitoring and Reporting

Logs and metrics give admins visibility, but manually pulling them is inefficient.
Here’s a minimal script to get you started:
Modules:
Az.Monitor,Az.Accounts,Az.Compute
Example: pull CPU for all running VMs last 24h, average it, export for leadership.
powershell

Connect-AzAccount
$since = (Get-Date).AddDays(-1)
$out   = @()

$runningVMs = Get-AzVM -Status | Where-Object { $_.PowerState -eq "VM running" }
foreach ($vm in $runningVMs) {
  $metrics = Get-AzMetric -ResourceId $vm.Id -TimeGrain 00:05:00 -MetricName "Percentage CPU" `
                          -StartTime $since -EndTime (Get-Date)
  $avg = ($metrics.Data.Average | Where-Object { $_ -ne $null } | Measure-Object -Average).Average
  $out += [pscustomobject]@{
    Subscription = (Get-AzContext).Subscription.Name
    ResourceGroup= $vm.ResourceGroupName
    VMName       = $vm.Name
    AvgCPU_24h   = [math]::Round(($avg),2)
  }
}

$out | Sort-Object AvgCPU_24h -Descending | Export-Csv -NoTypeInformation -Path ".\vm-cpu-report.csv"
Write-Host "Report written to vm-cpu-report.csv"
Variations: swap metric names (e.g.,
Network In Total,Disk Read Operations/Sec) or query Log Analytics withInvoke-AzOperationalInsightsQueryfor richer KQL-based reports.
What it does
- Connect-AzAccount and get all running VMs.
- Pulls Percentage CPU metric for each VM over the last 24h (
Get-AzMetricwith 5-min grain). - Calculates each VM’s average CPU and exports a ranked CSV.
Why it’s structured this way
- Gives a simple, cross-subscription capacity snapshot you can hand to management or use for right-sizing.
- Uses metrics API (fast and cheap) instead of heavier log queries when you only need headline stats.
What to customize
- Change metric (
"Percentage CPU") to storage/network metrics as needed. - Adjust
$sinceto different lookback windows. - Pipe CSV into an email notifier, Teams webhook, or upload to storage for archival.
Performance tips
- Large estates benefit from parallelization (e.g.,
ForEach-Object -Parallelin PowerShell 7) and batched queries.
With PowerShell you can:
- Export Azure Monitor logs into CSV/JSON for quick analysis.
- Schedule weekly or monthly reports (VM usage, storage growth, sign-in events).
- Automatically email reports to your IT/security team.
This improves transparency and helps identify issues before they escalate. For example, a script that checks daily sign-in attempts could alert admins about brute-force attacks before they become major incidents.
Free Resource: Get started with Azure Monitor PowerShell
5. Backup and Recovery Validation
Having backups is one thing — making sure they work is another.
Here’s a minimal script to get you started:.
Modules:
Az.RecoveryServices
Before running: create/select a Recovery Services vault.
powershell

Connect-AzAccount
$vaultName = "rsv-prod-eastus-01"
$rg        = "rg-platform-core-eastus"

$vault = Get-AzRecoveryServicesVault -Name $vaultName -ResourceGroupName $rg
Set-AzRecoveryServicesVaultContext -Vault $vault

# Check last 24h jobs (Succeeded/Failed)
$since = (Get-Date).AddDays(-1)
$jobs  = Get-AzRecoveryServicesBackupJob -From $since -To (Get-Date)

$summary = $jobs | Group-Object -Property Status | Select-Object Name,Count
$summary | Format-Table -AutoSize

# Alert if failures found
if ($jobs | Where-Object Status -ne "Completed") {
  Write-Warning "Backup issues detected in the last 24h!"
  # hook: send email/webhook here
}

# (Optional) Validate restore points exist for critical items
$policyItems = Get-AzRecoveryServicesBackupItem -BackupManagementType AzureIaasVM -WorkloadType AzureVM
foreach ($item in $policyItems) {
  $rp = Get-AzRecoveryServicesBackupRecoveryPoint -Item $item | Sort-Object -Property RecoveryPointTime -Descending | Select-Object -First 1
  if (-not $rp) { Write-Warning "No recovery points for $($item.FriendlyName)" }
}
What it does
- Selects a Recovery Services vault and sets vault context.
- Queries last 24h backup jobs and groups by status to surface failures quickly.
- Optionally enumerates protected items and checks for latest recovery point existence (quick sanity check).
Why it’s structured this way
- Ensures you don’t just “have backups,” but know they are healthy, with fast operational visibility.
- The optional restore-point check highlights items that might be silently drifting out of compliance.
What to customize
$vaultName,$rgto your vault.- Replace the simple warning with a notification hook (email, Teams, PagerDuty).
- Expand validation: periodically test-restore critical workloads to a sandbox.
PowerShell scripts can:
- Verify that Azure Backup jobs complete successfully.
- Test restore points on a regular schedule.
- Alert admins automatically if backup jobs fail.
Too often, organizations assume backups are reliable until disaster strikes. Automating validation ensures you can confidently restore data when it matters most
Free Resource: Azure Backup PowerShell Overview
Common Mistakes to Avoid
Even with automation, pitfalls remain:
- Hardcoding credentials: Always use secure methods like Azure Key Vault to store secrets.
- Skipping documentation: Scripts without notes are hard to maintain, especially in team settings.
- Testing in production: Always test automation in a sandbox first — small errors can have big consequences in production.
PowerShell vs Azure CLI: Choosing the Right Tool for the Task
Azure administrators have two powerful tools at their disposal: PowerShell (Az Module) and the Azure CLI. While they overlap in functionality, each has strengths that make it better suited for certain scenarios:
- Azure PowerShell (Az Module)
- Best for admins and IT pros who prefer working in PowerShell environments.
- Ideal for complex automation where object-oriented output, error handling, and detailed scripting are required.
- Integrates smoothly with other Microsoft tools like SCCM, Active Directory, and Entra ID.
- Example: Automating user provisioning, backup validation, or policy enforcement across subscriptions.
- Azure CLI
- Lightweight and cross-platform (runs in Bash, PowerShell, or directly in Azure Cloud Shell).
- Best for developers or cloud engineers who need quick, straightforward commands.
- Output is JSON by default, making it easier to plug into scripts and pipelines.
- Example: Quickly spinning up a test VM, applying tags, or running one-off queries across resources.
In practice, most admins use both. For instance, you might use PowerShell to automate scheduled compliance reports while using Azure CLI inside Cloud Shell to troubleshoot or manage a specific resource on the fly.
If you’re just getting started with CLI, check out my beginner guide: How I Automate Azure Tasks with CLI: A Step-by-Step Guide for Cloud Admins.
For those ready to go deeper, I’ve also published an advanced version: Advanced Azure CLI Automation: Loops, Dynamic Tagging, and Large-Scale Workflows.
Best Practices for Azure Automation
To maximize the value of PowerShell automation:
- Store scripts in version control (GitHub or Azure DevOps Repos) to track changes and collaborate with teammates.
- Parameterize scripts so they work across multiple environments without rewrites.
- Integrate with Azure Automation Runbooks for scheduling and central management.
- Use error handling and logging to troubleshoot faster and maintain audit trails.
- Regularly review and refine scripts as your Azure environment evolves.
Final Thoughts
For Azure admins, mastering automation is a career superpower. By using PowerShell to streamline repetitive tasks like user management, VM operations, and reporting, you not only save hours each week but also strengthen your security and compliance posture.
Start small — pick one of the tasks above, automate it, and expand from there. Over time, you’ll build a library of scripts that transforms how you manage Azure.
Automation isn’t about replacing admins; it’s about empowering them to focus on strategic projects instead of repetitive chores. And in today’s cloud-first world, that’s the kind of efficiency organizations value most.